Even these days, MacBooks still have tiny hard drives that fill up quickly. Luckily there are quick and easy ways to free up disk space on your hard drive. Here’s how to clean up your Mac’s hard disk and reclaim some drive space.

You can obviously free up disk space by simply doing a cursory find-and-delete for big files and other things that you’ve downloaded, but realistically that’s only going to get you so far. Most of the wasted space on your Mac is only going to be reclaimed if you look at lot deeper—cleaning out language files, removing duplicate files, deleting attachments, clearing temporary files, or emptying all of the Trash cans.
If you fail to keep your Mac’s hard drive clean, you’re eventually going to get the dreaded “Your disk is almost full” error, so you may as well start now and clear up some space.
How to Clear Up Disk Space On Your Mac the Easy Way
If you don’t feel like spending a bunch of time to find and clean things up manually, you can use
Duplicae Files Cleaner Pro to get rid of temporary files, clean up extra language files, uninstall applications, get rid of extra files left behind by application uninstallations, find and get rid of big attachments stored in Mail, and a whole lot more.
And of course, there’s a free trial that shows where your free space has gone and lets you clean up some of it for free.
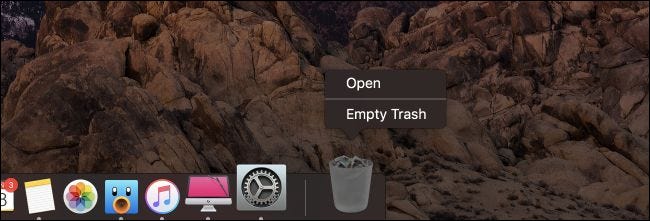
Empty Your Trash Cans
The Trash on a Mac is equivalent to the Recycle Bin on Windows. Rather than permanently deleting files from within the Finder, they are sent to your Trash so you can restore them later if you change your mind. To completely remove these files and free up the space they require, you’ll have to empty your Trash. But Macs can actually have multiple trash cans, so you may need to empty several.
To empty your user account’s main trash can, Ctrl-click or right-click the Trash icon at the bottom-right corner of the dock and select Empty Trash. This will delete all the files you sent to the trash from the Finder.
iPhoto, iMovie, and Mail all have their own trash cans. If you’ve deleted media files from within these applications, you’ll need to empty their trash cans, too. For example, if you use iPhoto to manage your pictures and delete them in iPhoto, you’ll have to clear the iPhoto trash to remove them from your hard drive. To do this, just Ctrl+click or right-click the Trash option in that specific application and select Empty Trash.
Uninstall Applications You Don’t Use
The applications you have installed on your Mac are taking up space, of course. You should uninstall them if you don’t need them—just open a Finder window, select Applications in the sidebar, and drag-and-drop the application’s icon to the trash can on your dock. Some of these applications can be taking up a ton of space.
To find out which applications are using up the most space, open a Finder window and select Applications. Click the “Show items in a list” icon on the toolbar and then click the Size heading to sort your installed applications by size.

You can also use the Uninstaller feature within Duplicate Files Cleaner Pro to find and delete applications—the major benefit to doing it this way is that you can delete applications that don’t show up properly in the Applications folder, as well as cleaning up all the junk that they leave behind.
Clean Up the Huge iTunes Backups of Your iPhone or iPad
If you’ve backed up your iPhone or iPad to your Mac using iTunes, you’ve probably got a bunch of massive backup files that are taking up a shocking amount of space. We were able to clear up over 200 GB of space by finding and deleting some of these backup files.
To delete them manually, you can open up the following path to see the backup folders, which will have random names, and you can delete the folders found inside. You’ll probably want to close iTunes before you do that.
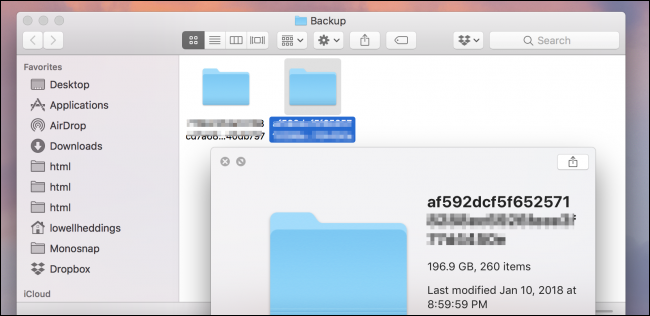
~/Library/Application Support/MobileSync/Backup
The easier (and much safer) way to delete them is to use Duplicate Files Cleaner Pro, which translates those confusing folders into actual backup names so you can decide which backup you actually want to delete. Just check the things you want to remove, and then click the Clean button.
Clear Out Temporary Files
Your Mac’s hard drive probably has temporary files you don’t need. These files often take up disk space for no good reason. Mac OS X tries to automatically remove temporary files, but a dedicated application will likely find more files to clean up. Cleaning temporary files won’t necessarily speed up your Mac, but it will free up some of that precious disk space.
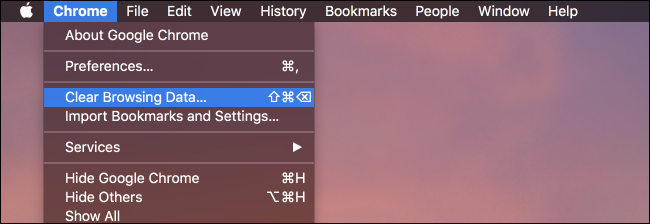
Your web browser has a built-in option to clear out browsing data that you can use to quickly clear up a bit of space—but it’s not necessarily a great idea. These caches contain files from web pages so your browser can load the web pages faster in the future. Your web browser will automatically start rebuilding the cache as you browse, and it will just slow down web page load times as your browser’s cache grows again. Each browser limits its cache to a maximum amount of disk space, anyway.
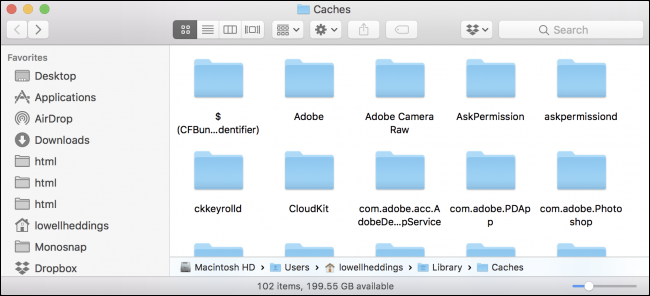
There are a lot of other temporary files on your system, which you can see by opening up Finder, using Go -> Go to Folder on the menu, and using ~/Library/Caches to get to the cache folder. This will pull up a folder that has a ton of folders in it, which you can select and delete manually if you choose.
You can clean up temporary files easier, and much safer, by using Duplicate Files Cleaner Pro. Just open it up and run through a scan, and then go into the System Junk section to identify all of the cache files and other things that you can clean up. Once you’ve selected what you want or don’t want to clean, just click the Clean button.
One of the things that makes a utility like Duplicate Files Cleaner Pro so great is that it converts a lot of those confusing folder names into the names of the actual applications, so you can see which temporary files you’re actually deleting.
The thing about temporary files, of course, is that most of them are going to come back after you use your Mac for a while. So deleting temporary files is great, but only works for a while.
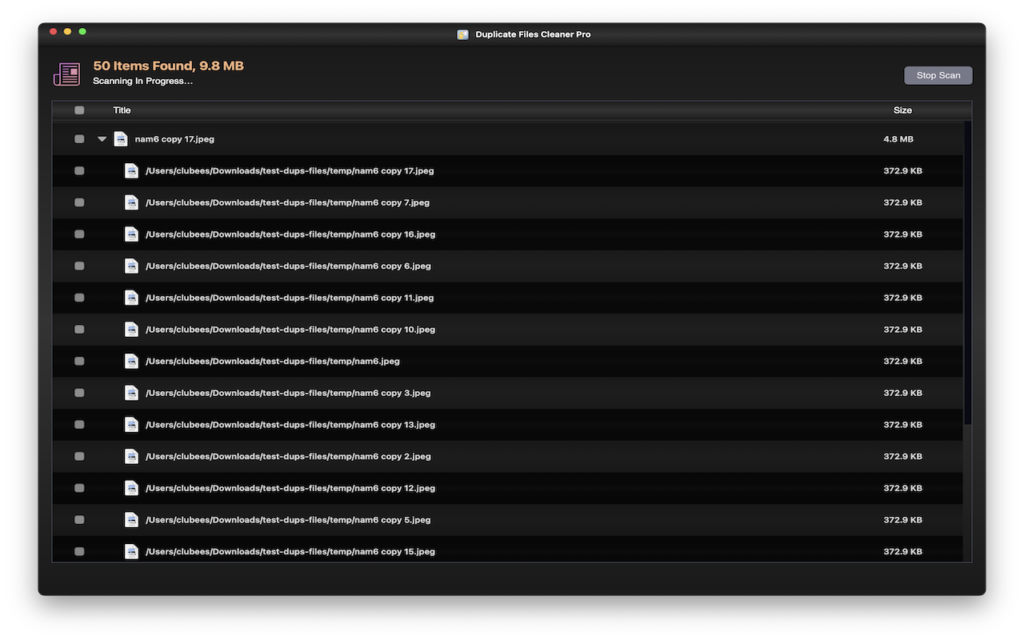
Find and Remove Duplicate Files
One of the trickiest things that can take up lots of drive space are duplicate files littering up your computer—this is especially true if you’ve been using the computer for a long time. Luckily there are great apps like Duplicate Files Cleaner Pro that can be used to find and remove duplicate files with a really slick and easy interface.
You can buy it on the App Store if you want — Apple had this one as their Editors’ Choice, but you’re probably better off getting it from their website, because they have a free trial available there.
There are a lot of other choices on the App Store and elsewhere, but we’ve used this one and had good results.